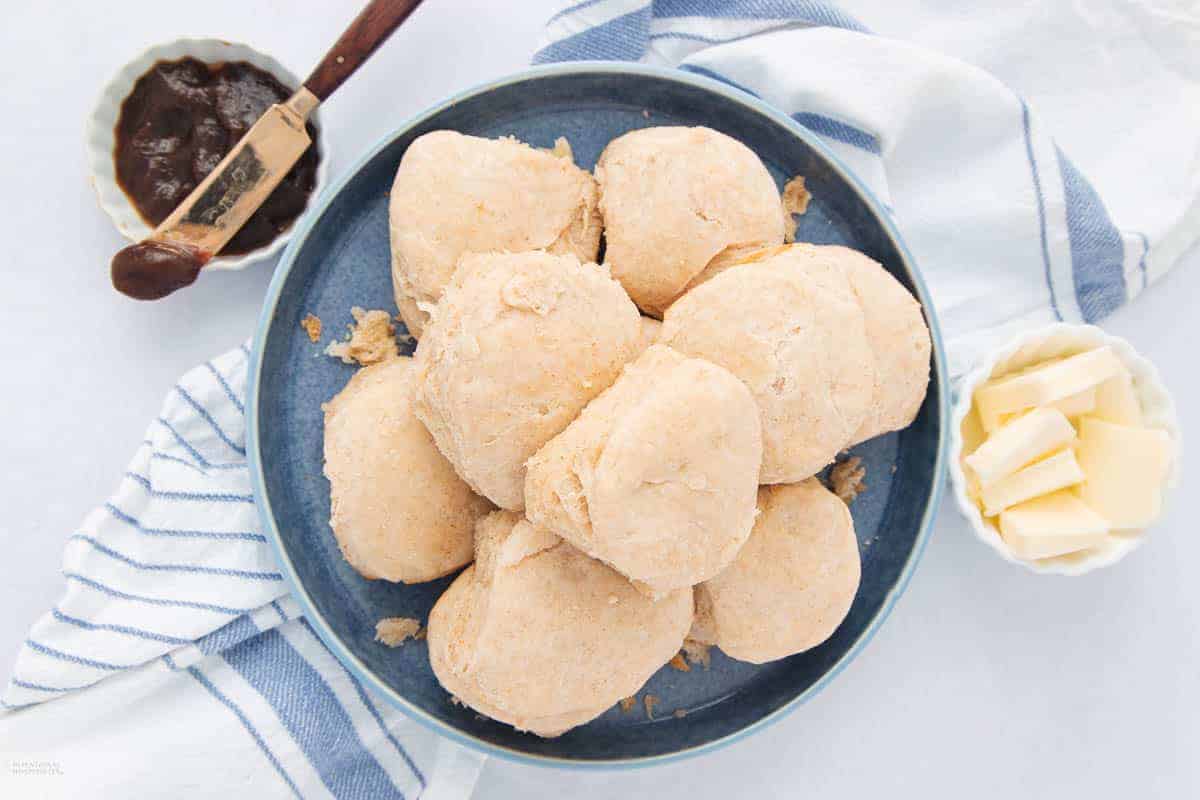
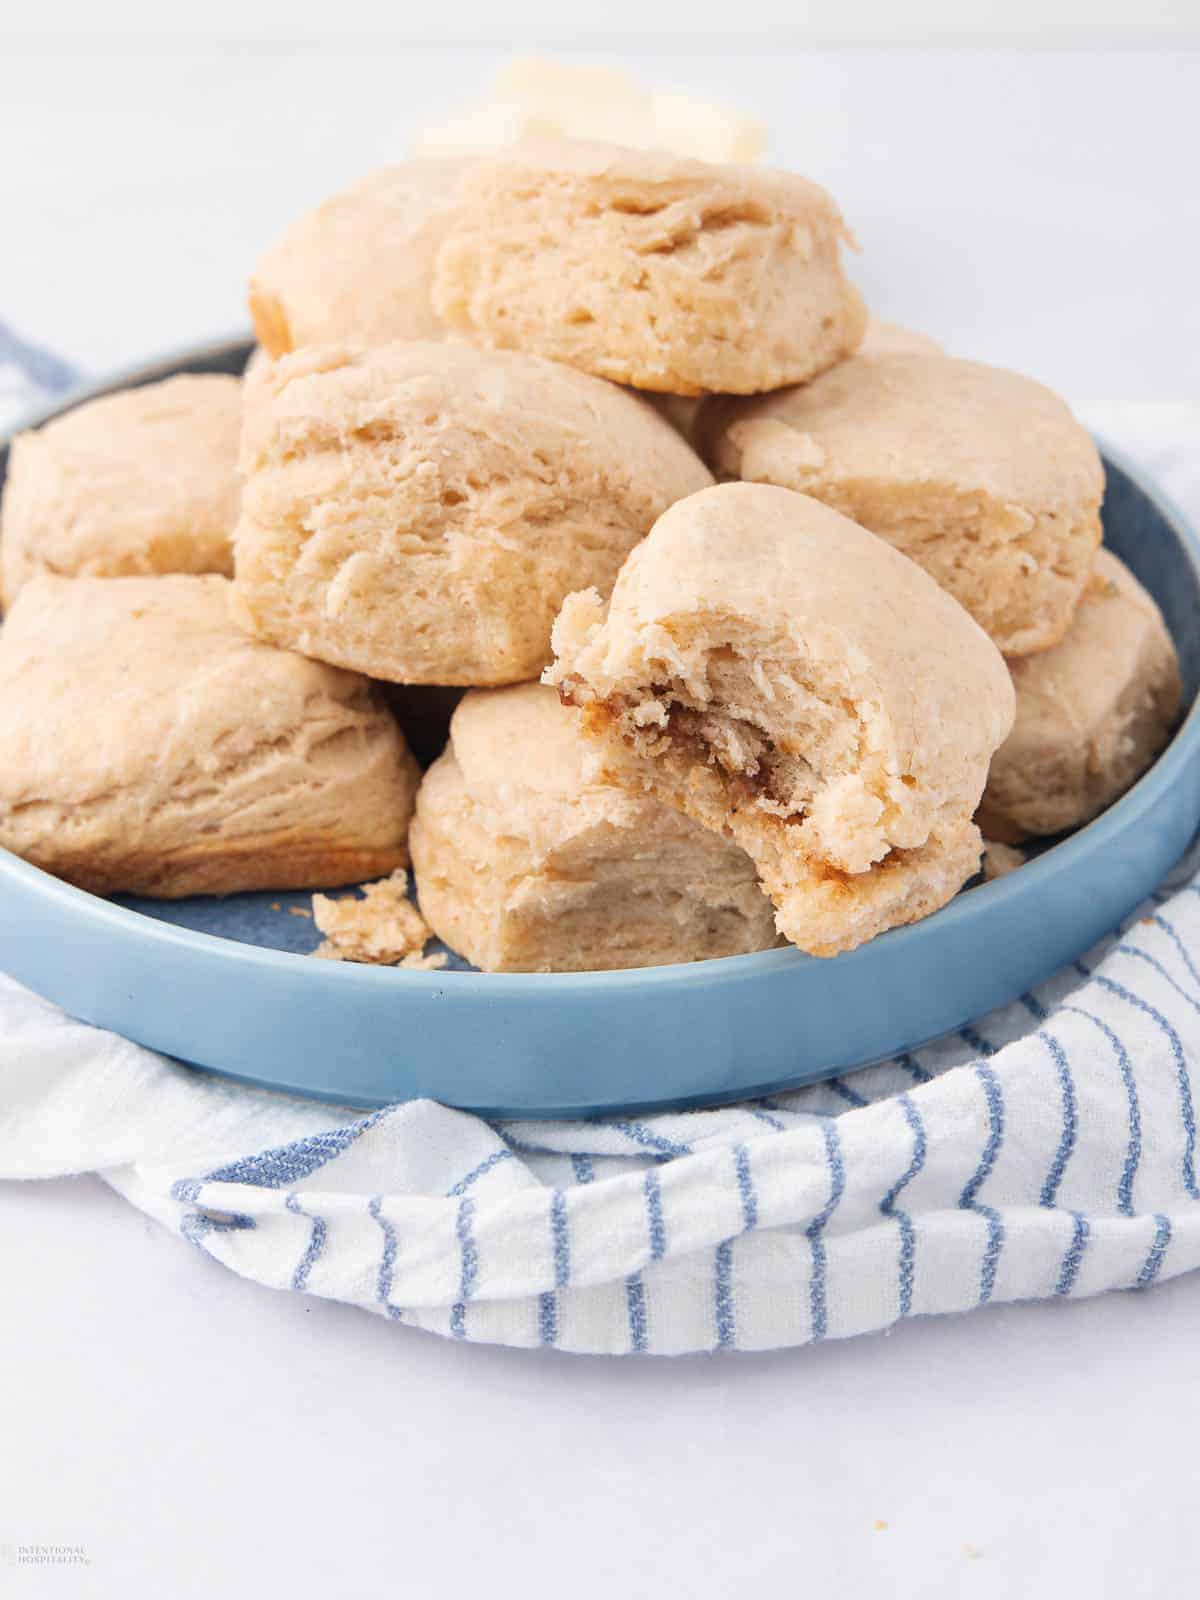
Irresistibly Flaky Sourdough Discard Biscuits
If you’ve got a sourdough starter sitting on your counter, begging to be used, these flaky, buttery sourdough discard biscuits are about to become your new favorite thing. They bake up with pull-apart layers that are crisp on the outside, tender inside, and packed with a hint of tang from your active sourdough starter or discard.
No more tossing out perfectly good starter. Here is how you turn it into warm, tender biscuits that are impossible to resist!
These homemade sourdough discard biscuits come together in 40 minutes and don’t require any rise time! They bake up beautifully in a cast-iron skillet with a little butter for that extra crispy bottom.
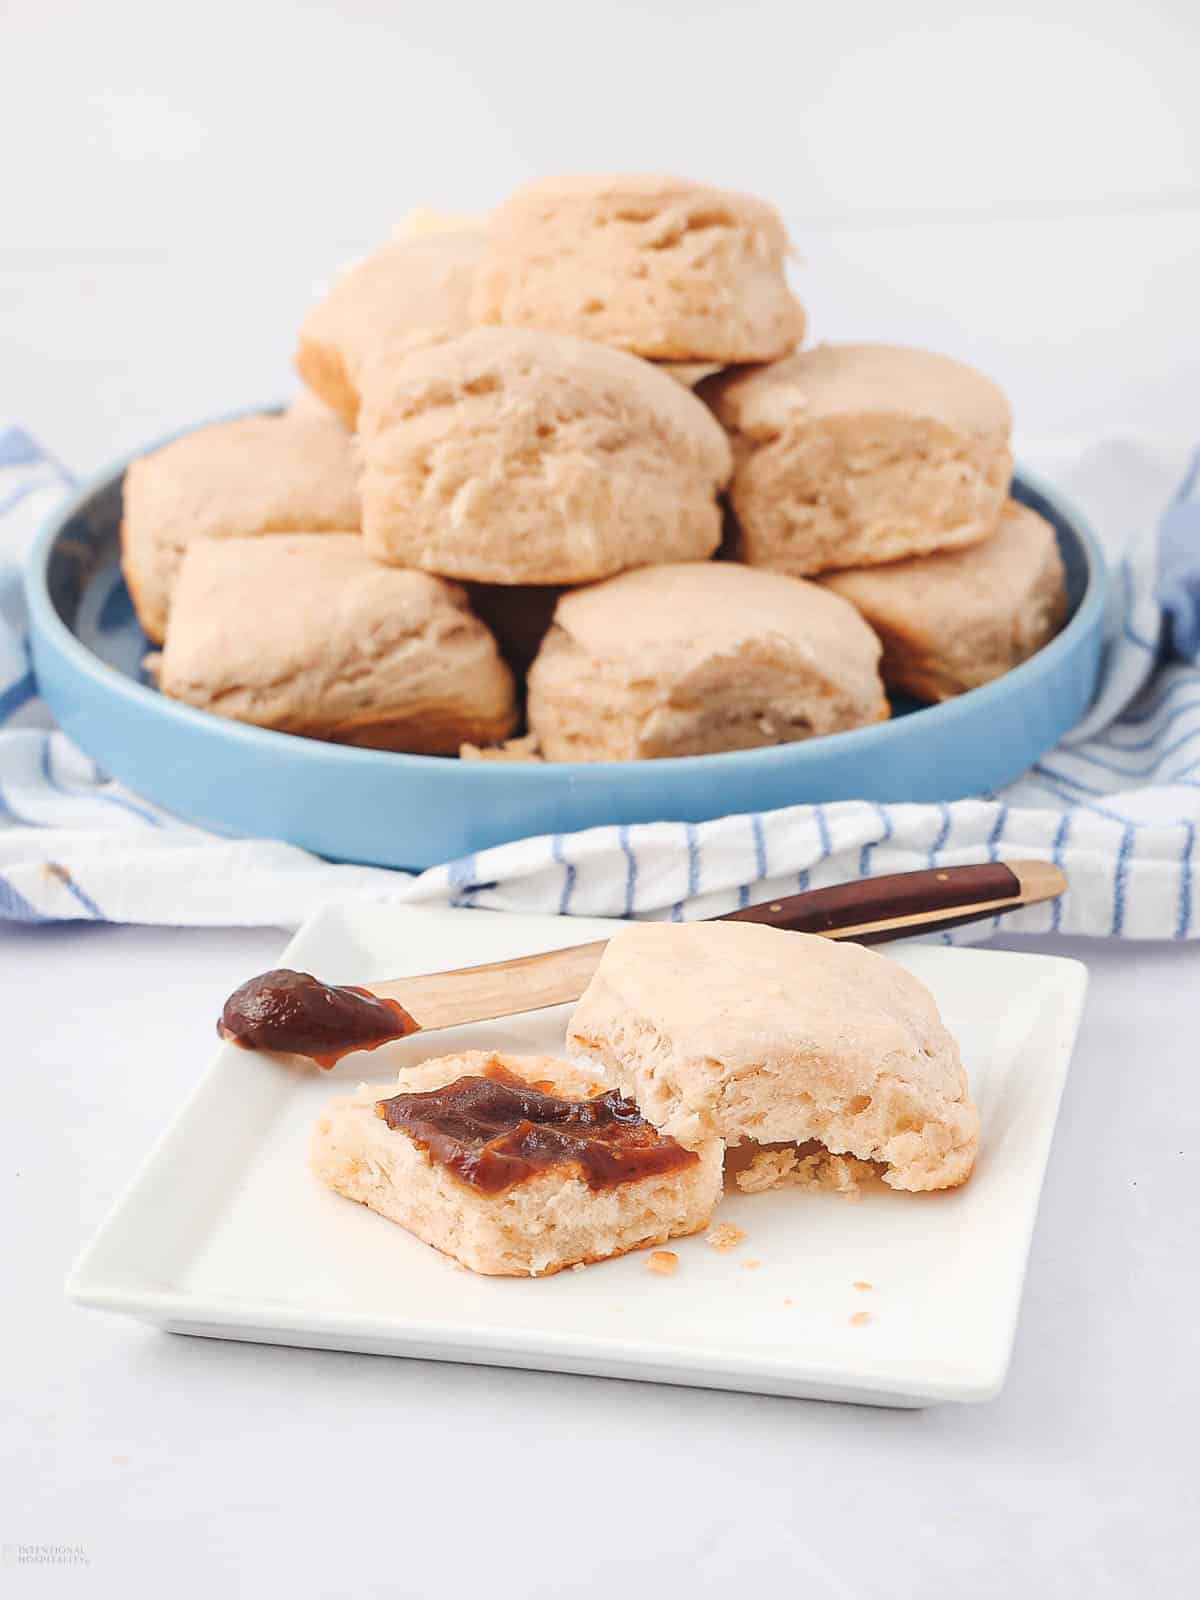
Spread on some butter and honey, or make flaky breakfast sandwiches. They’re always a hit with the whole family and are the perfect addition to any brunch spread!
Great Reasons You Will Want to Make This Recipe
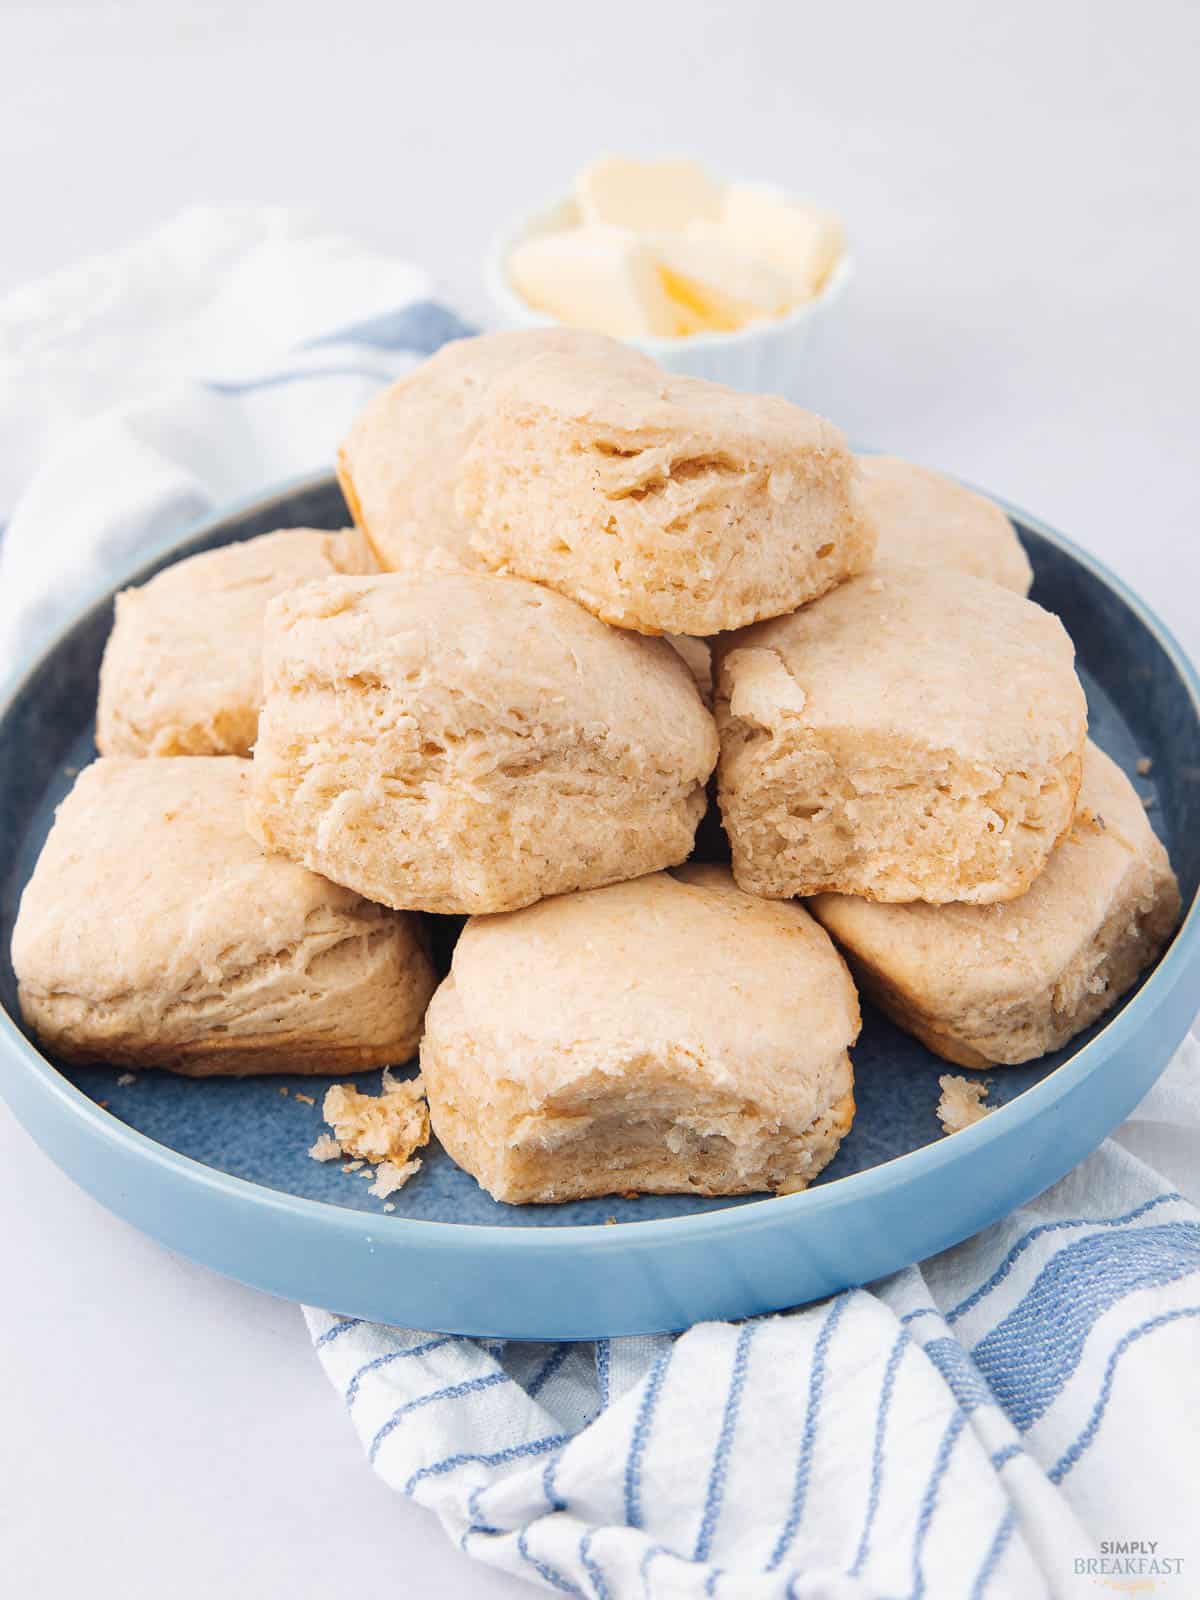
These easy sourdough discard biscuits are a step above traditional buttermilk biscuits, with the rich, tangy flavor of sourdough starter taking center stage. Enjoy them on their own or as part of a big breakfast spread.
- Packed with flavor: Buttery, slightly tangy, and perfectly fluffy.
- No fancy steps: No need to wait for the dough to rise, so they’re ready in under an hour.
- Perfect for leftover starter: A great way to use up extra sourdough discard instead of tossing it.
- Make-ahead of time: You can assemble the biscuits in the pan up until the point of baking, then either refrigerate or freeze the dough.

Here’s Your Grocery List For Sourdough Discard Biscuits
You only need a few basic ingredients to make these homemade biscuits!
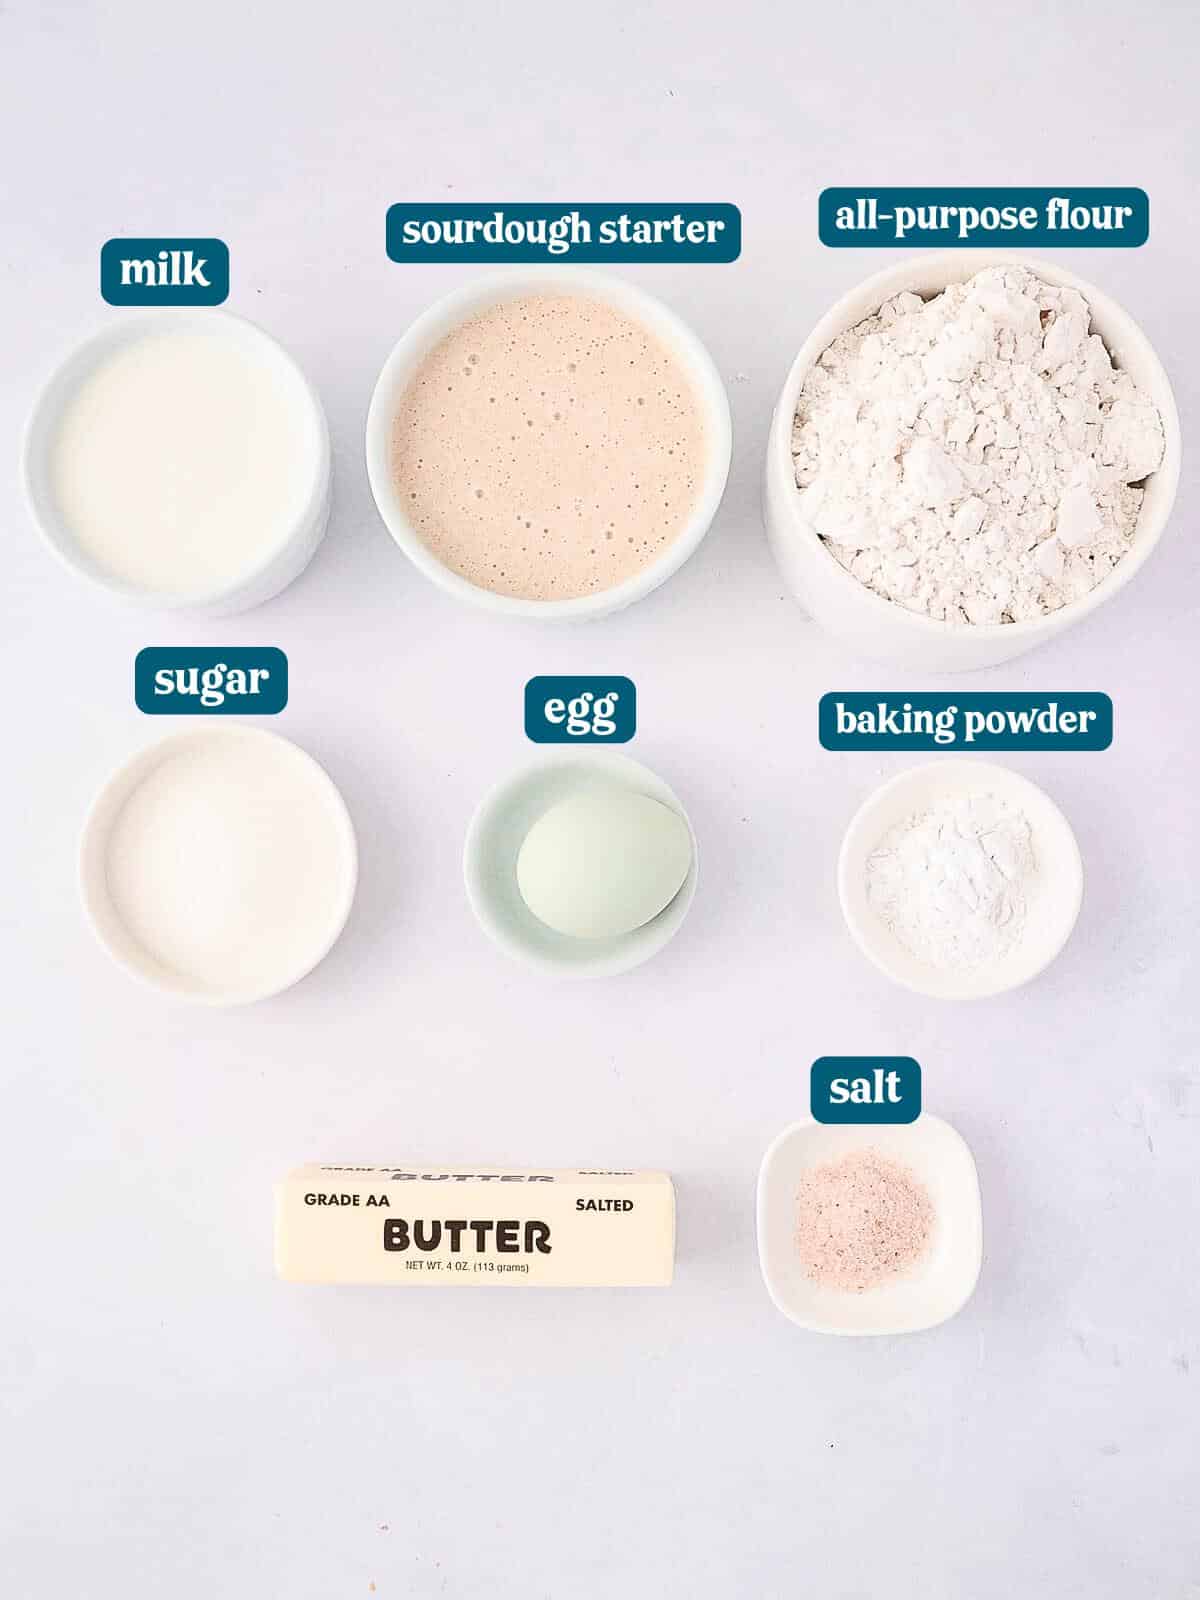
- All-purpose flour: Provides structure. If you want a little nuttier flavor, swap in some whole wheat flour.
- Salt: A pinch of salt brings the flavors and balances the tanginess from the sourdough.
- Sugar: A touch of sweetness that enhances the overall taste.
- Baking powder: Helps create those tall, fluffy layers.
- Cold butter: The secret to flaky biscuits! Keep it extra cold and grate it for the best texture.
- Sourdough starter: Adds that signature tang. Active starter or leftover sourdough discard both work!
- Egg: Adds richness and helps with structure. Make sure this is at room temperature before adding it to the dough.
- Milk: Creates a soft, tender dough. Buttermilk would add even more flavor!
- Butter for the skillet: A crispy, golden crust starts with melted butter in the pan.
Note: You can find the full recipe with ingredients and measurements in the recipe card located at the bottom of this post.
How To Make Sourdough Discard Biscuits
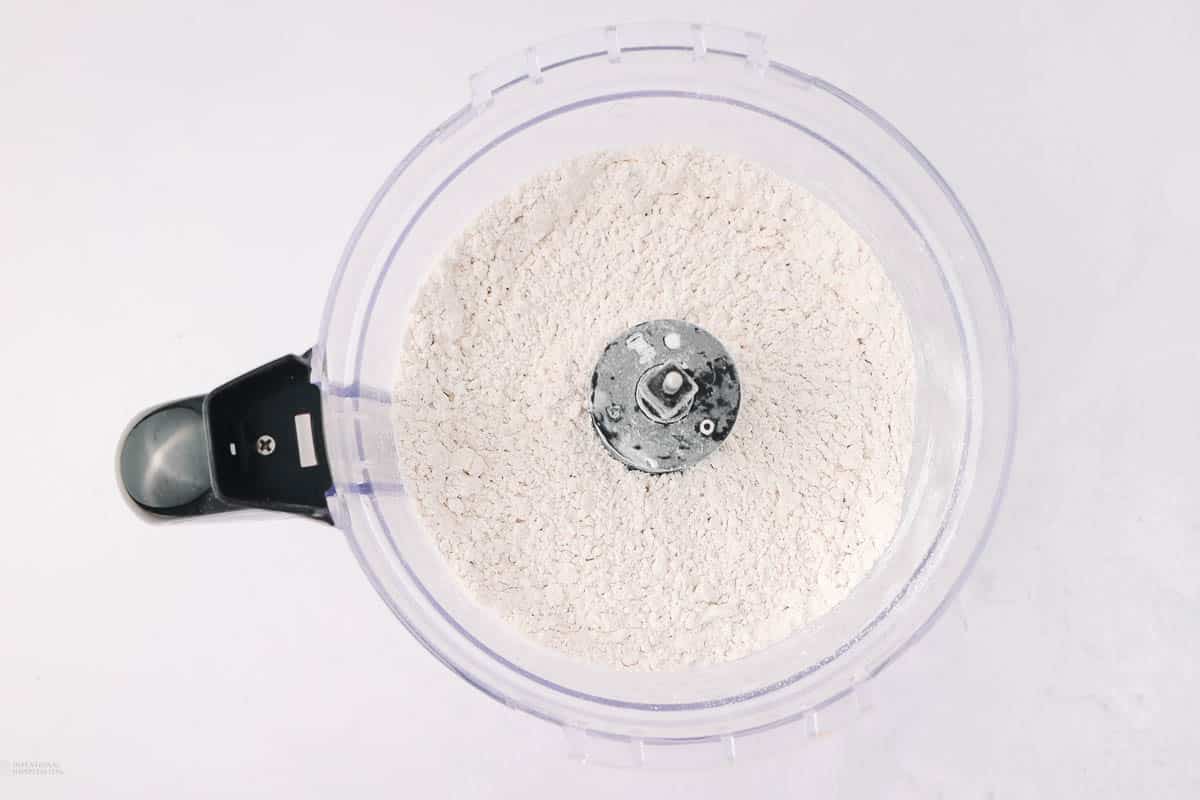
Step 1: Mix Dry Ingredients
Add all your dry ingredients to a food processor and pulse a few times to combine.
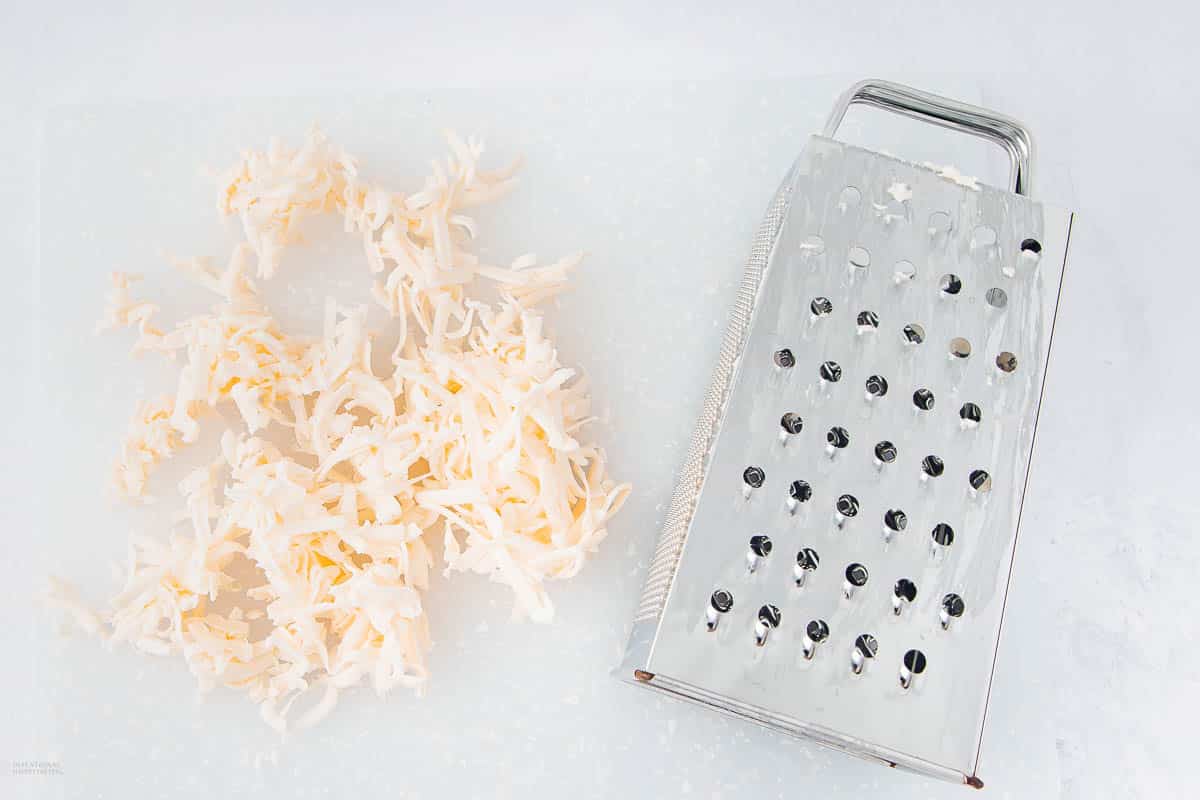
Step 2: Grate the Butter
Using a box grater, grate the butter into fine shreds. This makes it easier to incorporate into the dry ingredients!
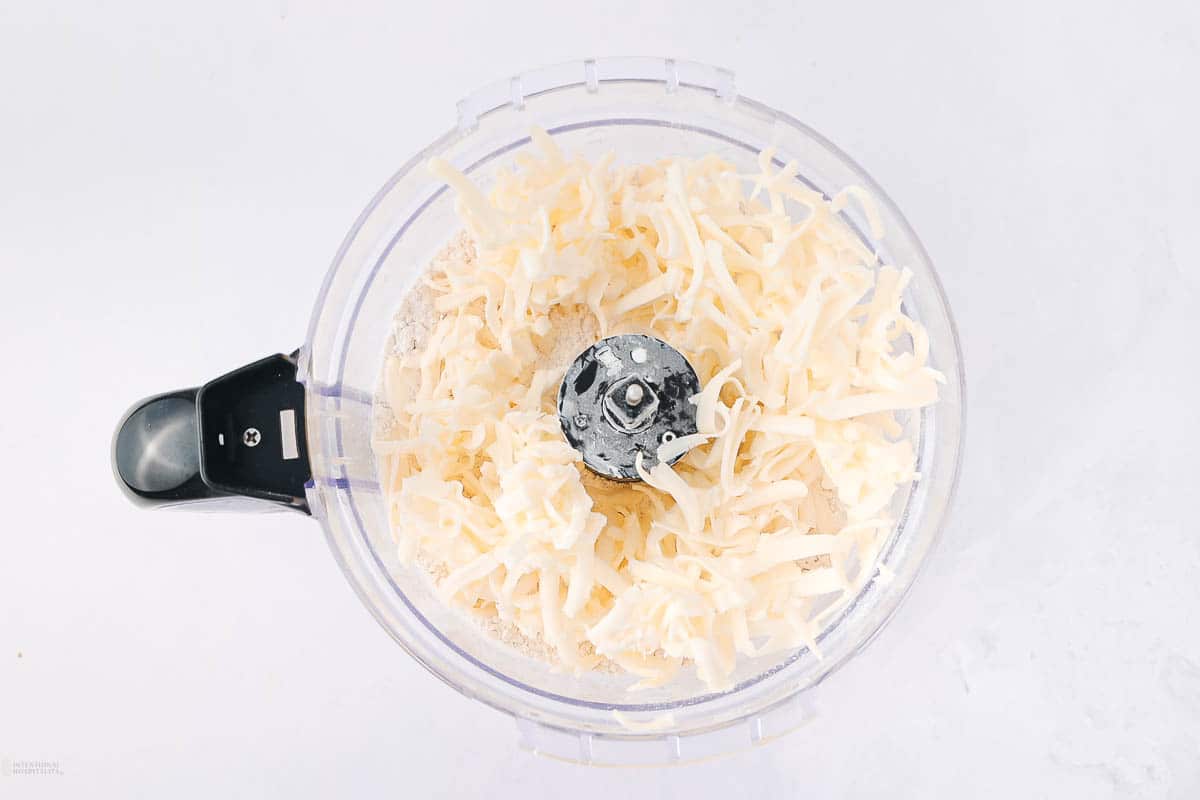
Step 3: Add the Shredded Butter
Add the shredded butter to the food processor.
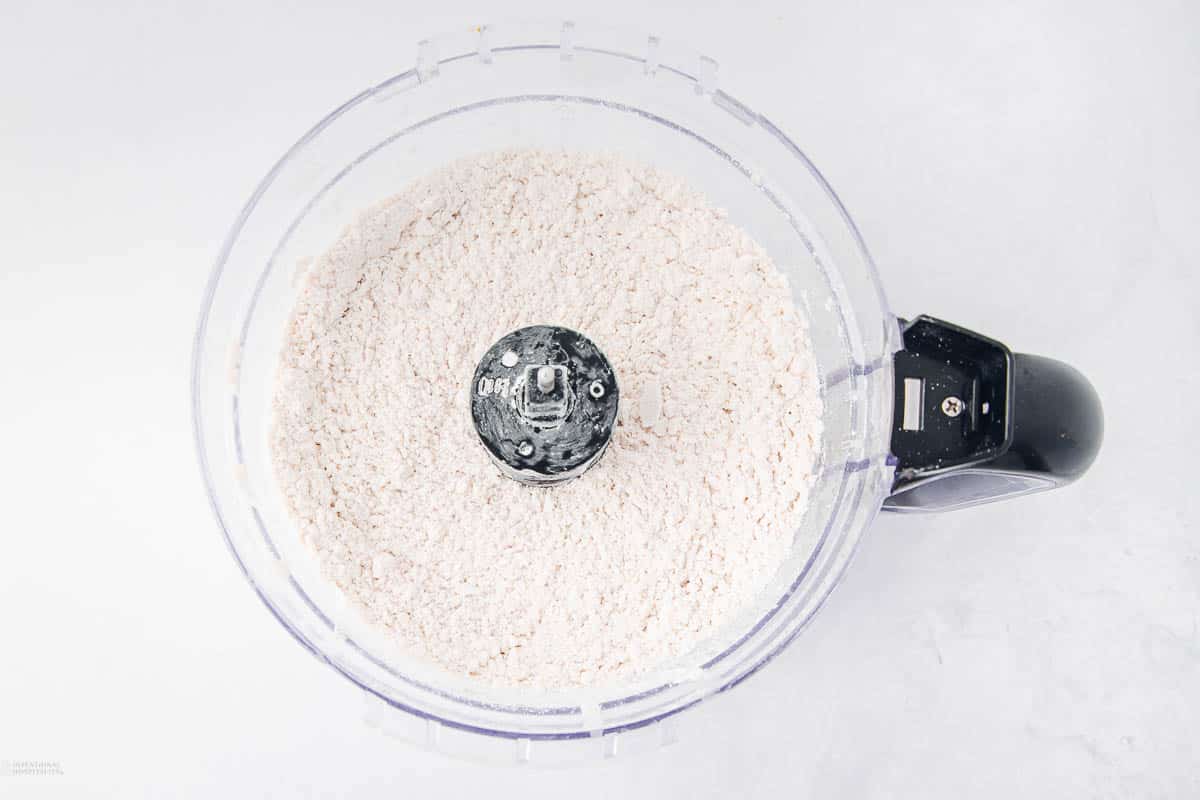
Step 4: Pulse the Butter
Pulse until the butter is combined and the dough resembles fine crumbs.
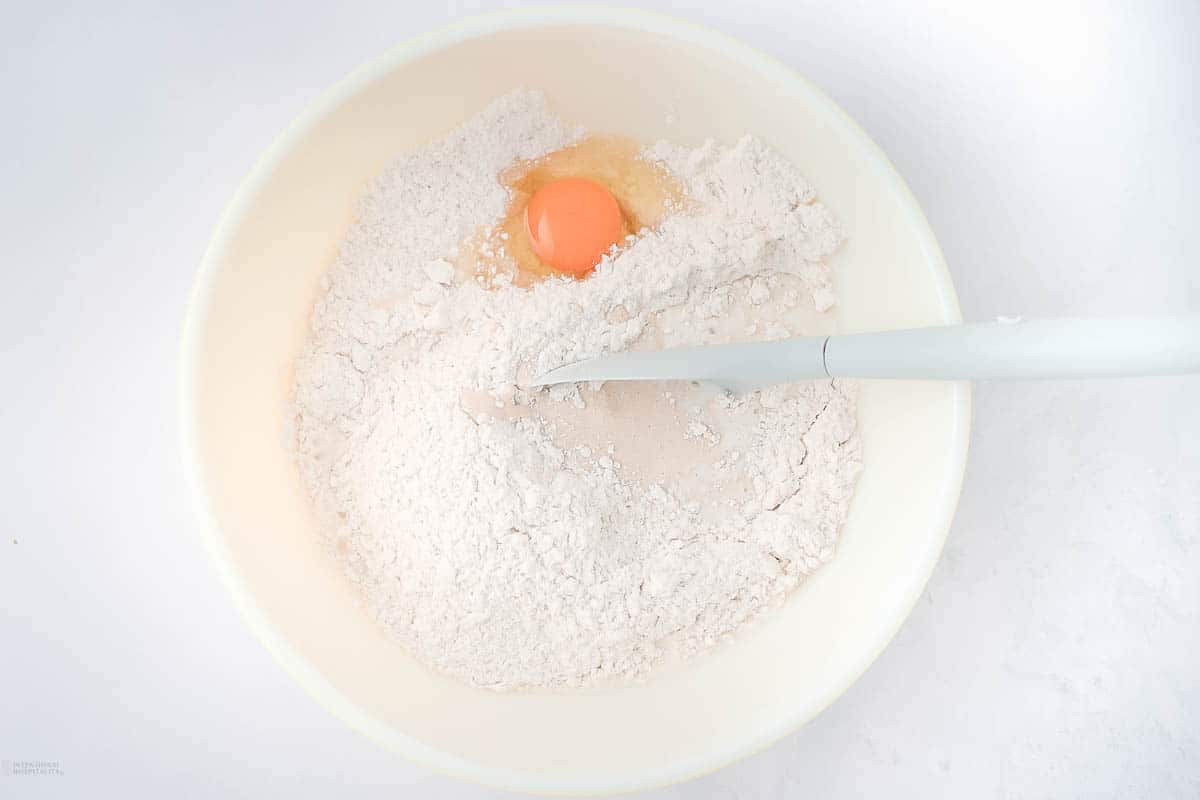
Step 5: Add the Egg
Transfer the butter and dry ingredient mixture to a bowl. Add the egg, milk, and sourdough starter.
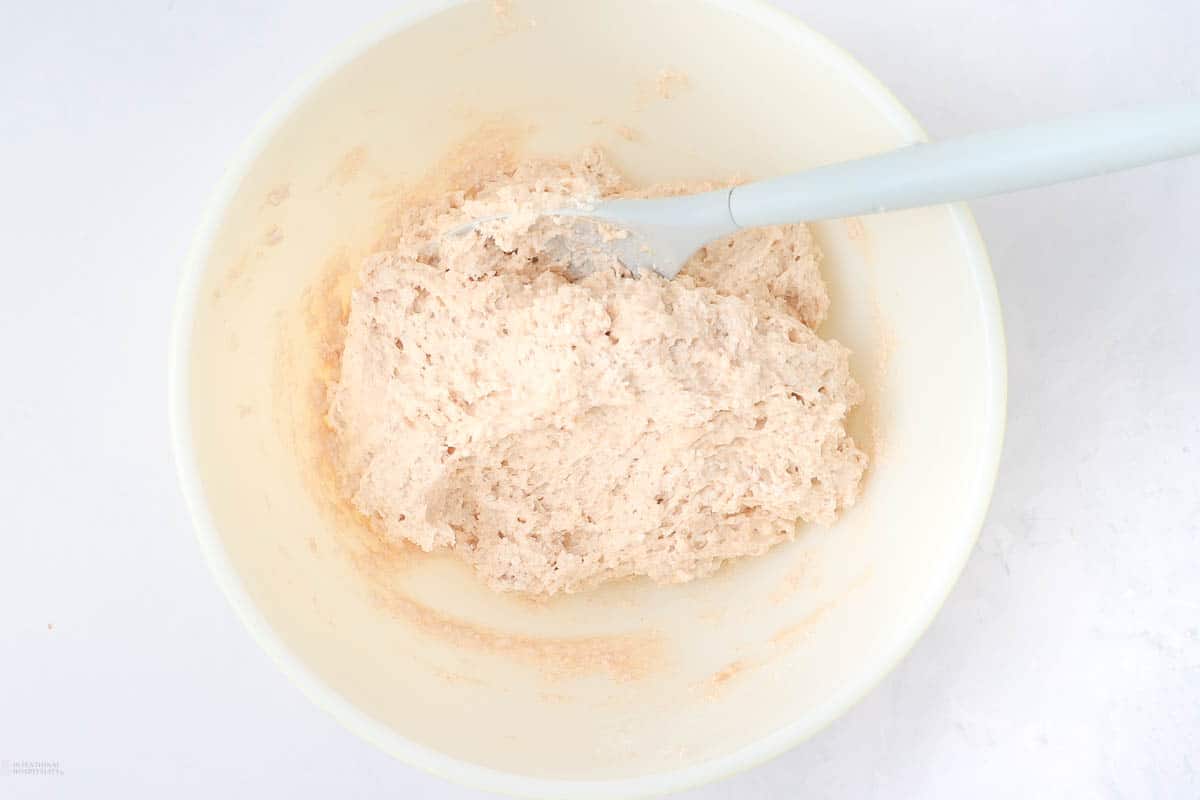
Step 6: Mix to Combine
Stir just until a shaggy dough forms.
Pro tip: Do not overwork the dough!
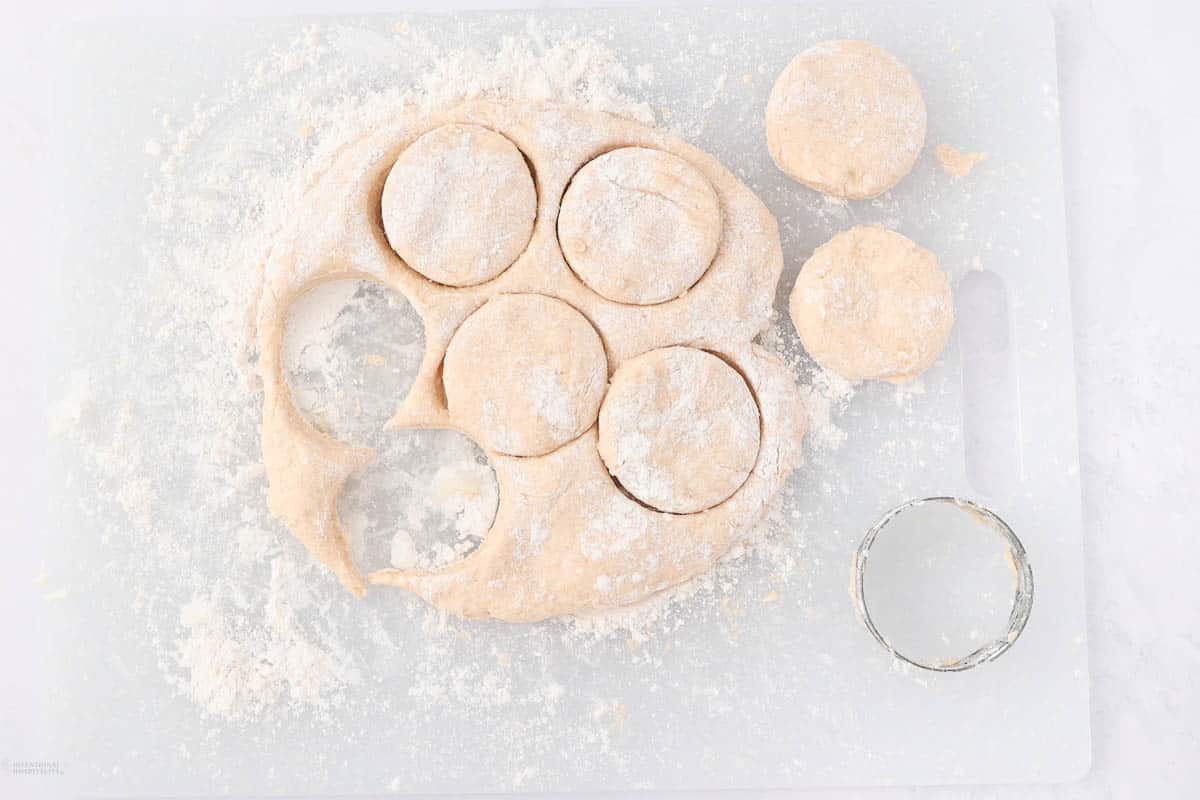
Step 5: Cut the Biscuits
On a lightly floured surface, gently fold the dough over itself a few times. This helps create those buttery, pull-apart layers. Flatten it out with your hands, or use a rolling pin. Then, cut the dough into biscuits with a sharp pastry cutter.
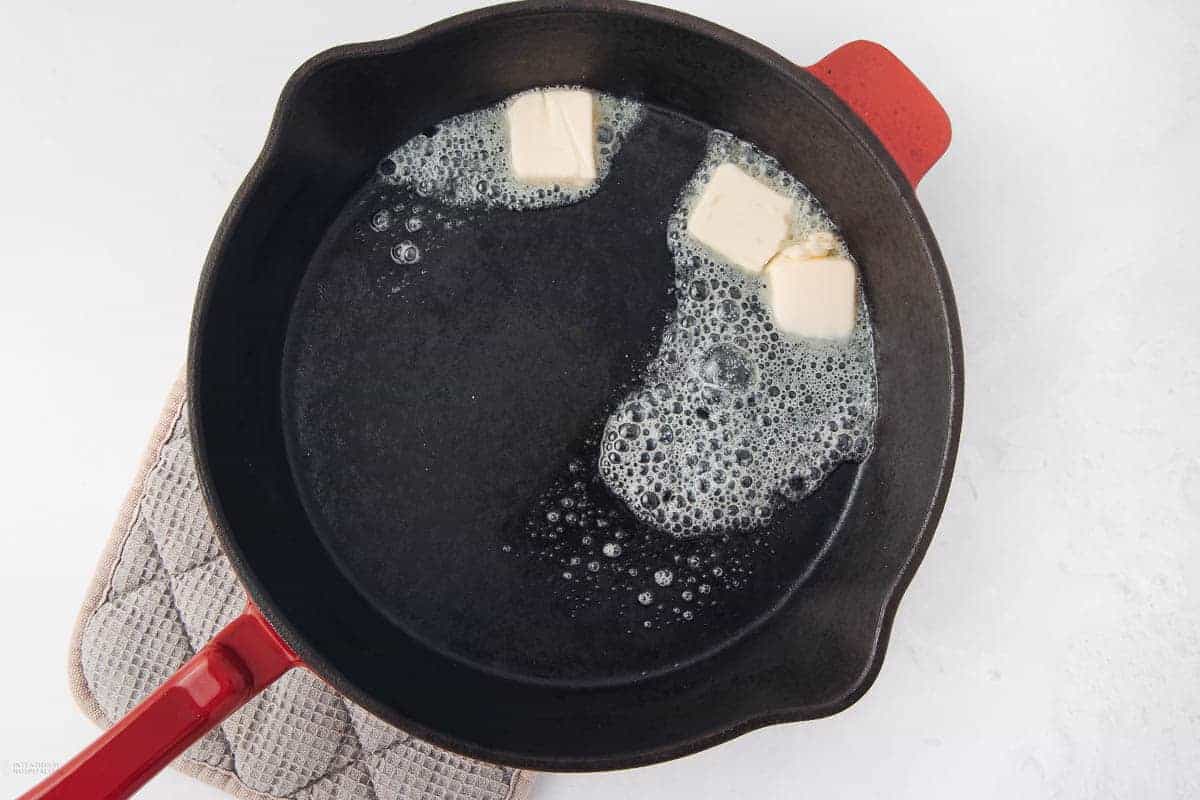
Step 6: Melt Butter
Melt some butter in a skillet. The butter helps the bottom of the biscuits become crispy and golden brown!
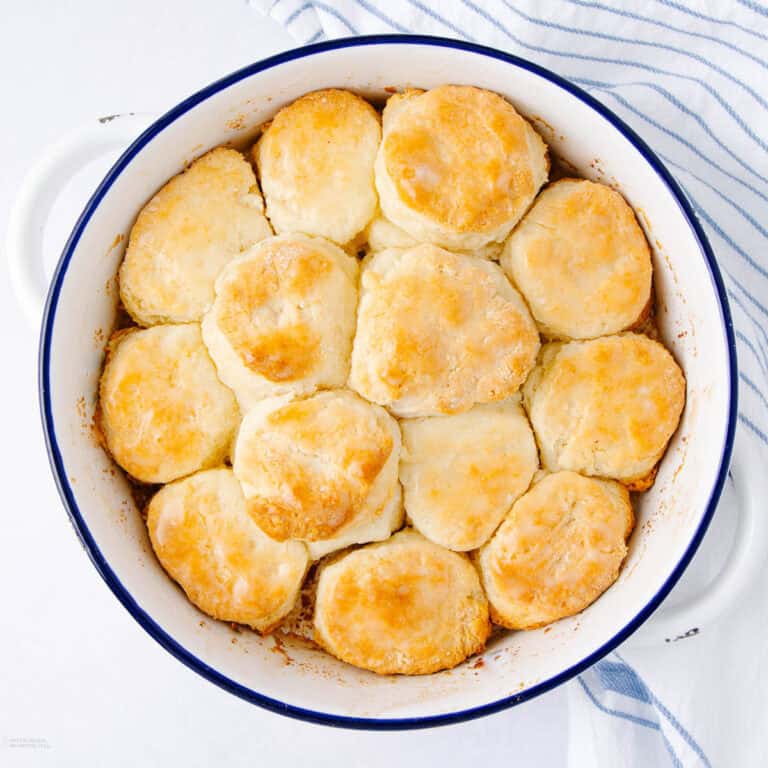
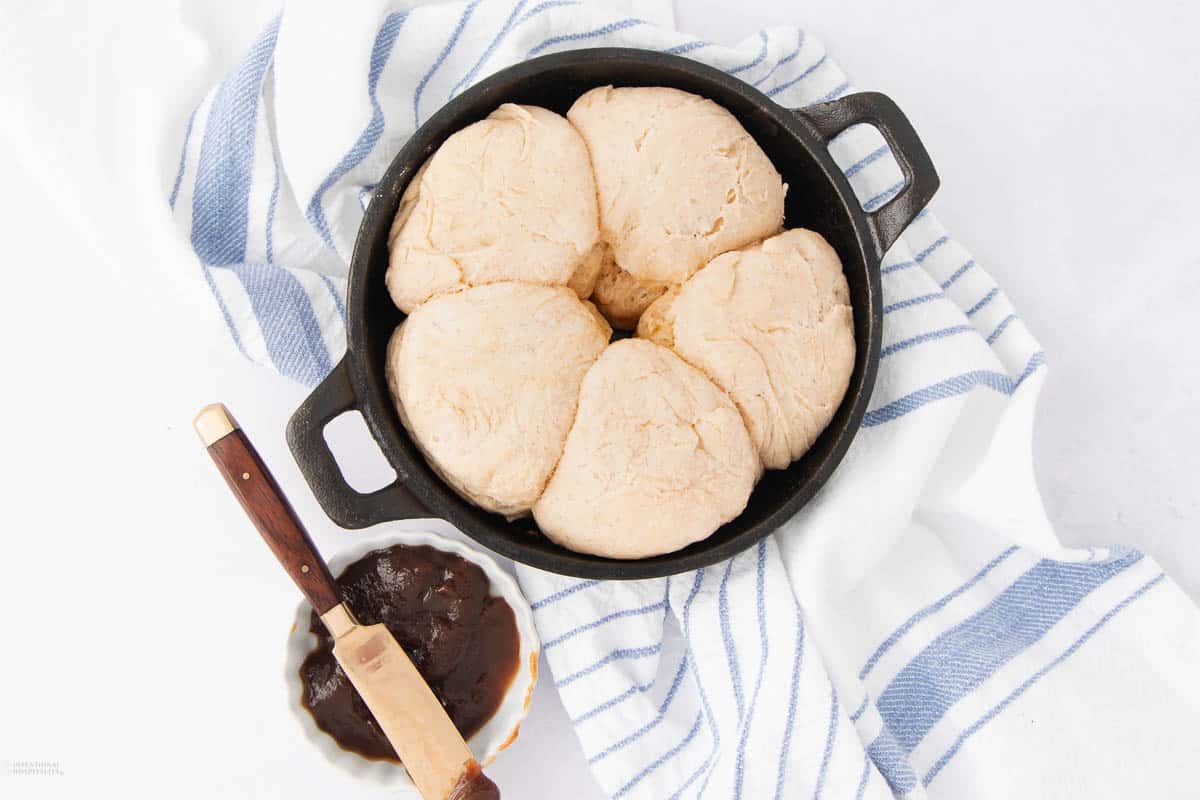
Step 7 : Baking or Cooking Instructions
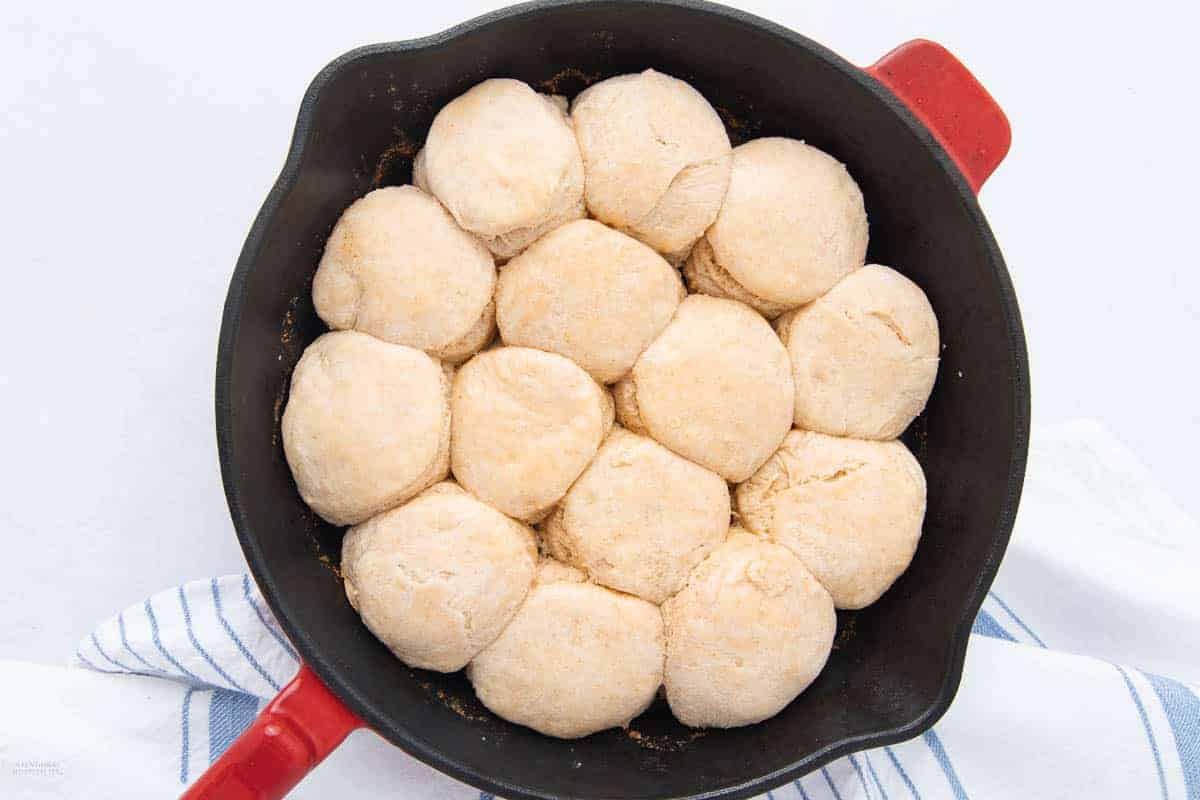
Arrange the biscuits close together so they climb up on one another, leading to a higher rise. Bake until golden brown and fluffy.

Variations
- Make it cheesy: Add shredded cheddar or Parmesan for extra flavor.
- Herb-infused: Mix in chopped rosemary, thyme, or chives for an herby twist.
- Sweeter biscuits: Increase the sugar and add a drizzle of honey on top before baking.
- Dairy-free option: Swap the butter for plant-based butter and use almond milk.
Top Tips
- Keep everything cold: Cold butter is the secret to flaky layers! You can grate frozen or super cold butter directly into the dry ingredients. It blends more evenly and keeps the dough cool.
- Don’t overwork the dough: Mixing too much develops gluten, which makes biscuits tough instead of tender. Stir the dough just until it comes together, then stop! When folding the dough, use gentle hands. Press, don’t knead.
- Layering = flakiness: For sky-high, flaky biscuits, fold the dough over itself at least 5-6 times before rolling it out. This creates pockets of butter that expand in the oven, giving you those beautiful, pull-apart layers.
- Sharp cutter, no twisting: When cutting biscuits, use a sharp-edged biscuit cutter or even a knife. Press straight down. Don’t twist! Twisting seals the edges, stopping them from rising properly.
- Bake close together: Placing biscuits close together helps them rise taller by supporting each other as they bake. If you want softer sides, snuggle them up against each other. For crispy edges, space them slightly apart.
- Brush with butter: For extra richness, brush the tops of the biscuits with melted butter before and after baking. For a golden shine, you can add a touch of cream or egg wash before popping the biscuits into the oven.
My Favorite Tools For Making Sourdough Discard Biscuits
 Buy Now →
  Buy Now →
Frequently Asked Questions
Store biscuits in an airtight container at room temp for 2-3 days. Reheat in a 350°F oven for 5 minutes or pop them in the microwave for 15 seconds.
Yes! Freeze baked biscuits for up to 1 month. Let them thaw on the counter before reheating!
Absolutely! You can refrigerate or freeze the cut biscuits. Refrigerate for up to 48 hours or freeze for up to 3 months. You can bake straight from the fridge or freezer. Just make sure to add more time!
The hot skillet gives these biscuits crispy, buttery edges, unlike a regular baking sheet.
You can keep sourdough starter in the fridge for about a week without feeding it, making it perfect for low-maintenance baking. If you don’t plan to use it for longer, feed it once every 1-2 weeks to keep it alive. Just stir, discard some, and refresh with flour and water. When you’re ready to bake, bring it to room temperature and feed it a couple of times to reactivate the microbes!
Serving Ideas
Pair with scrambled eggs, bacon, or sausage gravy. You can also assemble a huge brunch spread with muffin mix muffins, cottage cheese egg bites. Or my favorite, make a turkey bacon biscuit sandwich.
Biscuits and a hot Oat Milk Latte are a match made in heaven!
Try honey butter, jam, or a drizzle of hot honey on top.
To keep your sourdough discard biscuits warm before serving, cover them loosely with a clean kitchen towel or place them in a warm oven (set to low heat) until you’re ready to serve. This will help maintain their soft texture without drying them out. You can also wrap them in foil to keep the heat in if you’re serving them later.
Irresistibly Flaky Sourdough Discard Biscuits

Ingredients
- 2 1/2 cups all-purpose flour
- 1 teaspoon salt
- 2 tablespoons sugar
- 4 teaspoons baking powder
- 3/4 cup butter very cold
- 1 cup sourdough starter active or discard
- 1 egg whole
- 1/2 cup milk
- 2 tablespoons butter for the skillet
Instructions
Preheat the Skillet
- Preheat a cast-iron skillet in the oven or on the stove at 425°F.
Make the Biscuit Dough
- Combine dry ingredients in a large bowl or food processor.2 1/2 cups all-purpose flour, 1 teaspoon salt, 2 tablespoons sugar, 4 teaspoons baking powder
- Grate or cut cold butter into the dry ingredients until crumbly.3/4 cup butter
- Mix in sourdough starter, egg, and milk. Stir gently until the dough is shaggy—don’t overmix.1 cup sourdough starter, 1 egg, 1/2 cup milk
Shape and Cut the Biscuits
- On a floured surface, fold the dough over itself several times (5-6) for flaky layers.
- Flatten the dough into a 1-inch rectangle and cut biscuits with a sharp cutter, avoiding twisting.
Bake the Biscuits
- Melt butter in the hot skillet, spread evenly, and place biscuits close together.2 tablespoons butter
- Bake for 15-18 minutes until golden brown.
Notes
- Keep everything cold: Cold butter is the secret to flaky layers! You can grate frozen or super cold butter directly into the dry ingredients. It blends more evenly and keeps the dough cool.
- Don’t overwork the dough: Mixing too much develops gluten, which makes biscuits tough instead of tender. Stir the dough just until it comes together, then stop! When folding the dough, use gentle hands. Press, don’t knead.
- Layering = flakiness: For sky-high, flaky biscuits, fold the dough over itself at least 5-6 times before rolling it out. This creates pockets of butter that expand in the oven, giving you those beautiful, pull-apart layers.
- Sharp cutter, no twisting: When cutting biscuits, use a sharp-edged biscuit cutter or even a knife. Press straight down. Don’t twist! Twisting seals the edges, stopping them from rising properly.
- Bake close together: Placing biscuits close together helps them rise taller by supporting each other as they bake. If you want softer sides, snuggle them up against each other. For crispy edges, space them slightly apart.
- Brush with butter: For extra richness, brush the tops of the biscuits with melted butter before and after baking. For a golden shine, you can add a touch of cream or egg wash before popping the biscuits into the oven.